
Algebra tile
Algebra tiles are mathematical manipulatives that allow students to better understand ways of algebraic thinking and the concepts of algebra. These tiles have proven to provide concrete models for elementary school, middle school, high school, and college-level introductory algebra students. They have also been used to prepare prison inmates for their General Educational Development (GED) tests.[1] Algebra tiles allow both an algebraic and geometric approach to algebraic concepts. They give students another way to solve algebraic problems other than just abstract manipulation.[1] The National Council of Teachers of Mathematics (NCTM) recommends a decreased emphasis on the memorization of the rules of algebra and the symbol manipulation of algebra in their Curriculum and Evaluation Standards for Mathematics. According to the NCTM 1989 standards "[r]elating models to one another builds a better understanding of each".[2]
Examples[edit]
Solving linear equations using addition[edit]
The linear equation can be modeled with one positive tile and eight negative unit tiles on the left side of a piece of paper and six positive unit tiles on the right side. To maintain equality of the sides, each action must be performed on both sides.[1] For example, eight positive unit tiles can be added to both sides.[1] Zero pairs of unit tiles are removed from the left side, leaving one positive tile. The right side has 14 positive unit tiles, so .


-
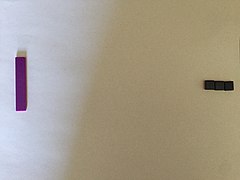
 Algebra tile model of
 -
 Algebra tile model of
 -
 Algebra tile model of


Solving linear equations using subtraction[edit]
The equation can be modeled with one positive tile and seven positive unit tiles on the left side and 10 positive unit tiles on the right side. Rather than adding the same number of tiles to both sides, the same number of tiles can be subtracted from both sides. For example, seven positive unit tiles can be removed from both sides. This leaves one positive tile on the left side and three positive unit tiles on the right side, so .[1]


-
 Algebra tile model of
 -
 Algebra tile model of


Multiplying polynomials[edit]
When using algebra tiles to multiply a monomial by a monomial, the student must first set up a rectangle where the length of the rectangle is the one monomial and then the width of the rectangle is the other monomial, similar to when one multiplies integers using algebra tiles. Once the sides of the rectangle are represented by the algebra tiles, one would then try to figure out which algebra tiles would fill in the rectangle. For instance, if one had x×x, the only algebra tile that would complete the rectangle would be x2, which is the answer.
Multiplication of binomials is similar to multiplication of monomials when using the algebra tiles . Multiplication of binomials can also be thought of as creating a rectangle where the factors are the length and width.[2] As with the monomials, one would set up the sides of the rectangle to be the factors and then fill in the rectangle with the algebra tiles.[2] This method of using algebra tiles to multiply polynomials is known as the area model[3] and it can also be applied to multiplying monomials and binomials with each other. An example of multiplying binomials is (2x+1)×(x+2) and the first step the student would take is set up two positive x tiles and one positive unit tile to represent the length of a rectangle and then one would take one positive x tile and two positive unit tiles to represent the width. These two lines of tiles would create a space that looks like a rectangle which can be filled in with certain tiles. In the case of this example the rectangle would be composed of two positive x2 tiles, five positive x tiles, and two positive unit tiles. So the solution is 2x2+5x+2.
Factoring[edit]


In order to factor using algebra tiles, one has to start out with a set of tiles that the student combines into a rectangle, this may require the use of adding zero pairs in order to make the rectangular shape. An example would be where one is given one positive x2 tile, three positive x tiles, and two positive unit tiles. The student forms the rectangle by having the x2 tile in the upper right corner, then one has two x tiles on the right side of the x2 tile, one x tile underneath the x2 tile, and two unit tiles are in the bottom right corner. By placing the algebra tiles to the sides of this rectangle we can determine that we need one positive x tile and one positive unit tile for the length and then one positive x tile and two positive unit tiles for the width. This means that the two factors are and .[1] In a sense this is the reverse of the procedure for multiplying polynomials.


References[edit]
Sources[edit]
- Kitt, Nancy A. and Annette Ricks Leitze. "Using Homemade Algebra Tiles to Develop Algebra and Prealgebra Concepts." MATHEMATICS TEACHER 2000. 462-520.
- Stein, Mary Kay et al., Implementing Standards-Based Mathematics Instruction. New York: Teachers College Press, 2000.
- Larson, Ronald E., Algebra 1. Illinois: McDougal Littell,1998.