
Battle of Mount Tumbledown
| Battle of Mount Tumbledown | |||||||||
|---|---|---|---|---|---|---|---|---|---|
| Part of the Falklands War | |||||||||
 Mount Tumbledown, Two Sisters, and Wireless Ridge, as seen from Stanley Harbour. | |||||||||
| |||||||||
| Belligerents | |||||||||
|
|
| ||||||||
| Commanders and leaders | |||||||||
|
|
| ||||||||
| Units involved | |||||||||
|
|
5th Naval Infantry Battalion 1st Marine Field Artillery Battalion 1st Marine Anti-Aircraft Regiment 4th Infantry Regiment 12th Infantry Regiment | ||||||||
| Strength | |||||||||
|
641 soldiers 2 Scorpion light tanks 2 Scimitar light tanks 2 frigates |
700 marines 200 soldiers 3 Tigercat SAMs | ||||||||
| Casualties and losses | |||||||||
|
10 killed[1] 35 wounded[1] |
30 killed[1] 45 wounded[1] 30 captured | ||||||||
The Battle of Mount Tumbledown was an engagement during the Falklands War. The engagement was an attack by the British Army and the Royal Marines on the heights overlooking Stanley, the Falkland Islands capital. Mount Tumbledown, Mount William and Sapper Hill lie west of the capital. Due to their proximity to the capital, they were of strategic importance during the 1982 War. They were held by the Argentine 5th Naval Infantry Battalion (BIM 5), a reinforced, cold weather trained and equipped Marine battalion.
The assaulting British forces were the 2nd Battalion, Scots Guards, 42 Commando, Royal Marines Mortar platoon and four light tanks of the Blues and Royals. The 1st Battalion, 7th Duke of Edinburgh's Own Gurkha Rifles were held in reserve.
One of a number of night battles that took place during the British advance towards Stanley, the battle led to British troops capturing all the heights above the town, allowing the town's capture and the surrender of the Argentine forces on the islands.
Overview[edit]
On the night of 13–14 June 1982 the British launched an assault on Mount Tumbledown, one of the highest points near the town of Stanley, the capital, and succeeded in driving Argentinian forces from the mountain. This close-quarters night battle was later dramatized in the BBC drama Tumbledown.
The attacking British forces consisted of the 2nd Battalion, Scots Guards (2SG), mortar detachments from 42 Commando, Royal Marines and the 1st Battalion, 7th Duke of Edinburgh's Own Gurkha Rifles (1/7 GR), as well as support from a troop of the Blues and Royals equipped with two Scorpion and two Scimitar armoured vehicles.
The Argentinian forces defending the mountains were Commander Carlos Robacio's 5th Marine Infantry Battalion (BIM 5). In Argentine shelling directed by Marine Second Lieutenant Marcelo De Marco of the 5th Marines from his observation post on Tumbledown Mountain, four members of the 3rd Battalion, Parachute Regiment and one REME craftsman had been killed on Mount Longdon and another seven paratroopers wounded.
Prior to the British landings, the Argentine Marines battalion had been brought up to brigade strength by a company of the Amphibious Engineers Company (CKIA), a heavy machine-gun company of the Headquarters Battalion (BICO), a battery of the 1st Marine Field Artillery Battalion (BIAC), and three Tigercat SAM/Hispano-Suiza 30mm anti-aircraft gun batteries of the 1st Marine Anti-Aircraft Regiment, as well as a 2nd Marine Infantry Battalion platoon, a 3rd Marine Infantry Battalion platoon, a military police platoon and a canine platoon.
As part of the British plan, 1/7 GR was given the task of capturing the sub-hill of Mount William held by O Company, the 5th Marine Battalion's reserve, and then allowing the Welsh Guards through to seize Sapper Hill, the final obstacle before Stanley. The attack was supported by naval gunfire from HMS Active's 4.5 inch gun.
At the time of the battle, Marine Teniente de Navio (Ship-of-the-Line Lieutenant) Eduardo Villarraza's N Company held Mount Tumbledown. Mount William was just south of Tumbledown and the Marine battalion's O Company under Marine Captain Ricardo Quiroga was on its lower slopes. Major Oscar Ramon Jaimet's B (Bravo) Company, 6th Army Regiment was in reserve behind N Company. Marine Captain Rodolfo Oscar Cionchi's M Company occupied Sapper Hill. The Argentinian defenders held firm under the British 'softening up' bombardment, which began at 7:30 local time. Major Jaimet later recalled:
I heard the cries of the wounded calling for their comrades, twelve men wounded before nightfall. We thought we had suffered before, but what luxury and comfort compared to this.[2]
During the battle, the 5th Marines Command Post took five direct hits, but Commander Robacio emerged unscathed.[3]
Tumbledown defenders[edit]
Captain Eduardo Villarraza's N Company from the 5th Marine Battalion, would defend Mounts Tumbledown and William.
- The 1st Platoon, under by Marine Second Lieutenant (Guardiamarina or Midshipman) Carlos Bianchi, was dug in on Mount William.
- The 2nd Platoon, led by Marine Second Lieutenant Marcelo Oruezabala, was dug in between Tumbledown and William.
- The 3rd Platoon, under Marine Sergeant (Suboficial or Chief Petty Officer) Jorge Lucero, was dug in on the northern slopes of Tumbledown, overlooking Moody Brook.
- The 4th Platoon, led by Sub-Lieutenant Carlos Daniel Vázquez, was dug in near the summit of Tumbledown, covering the western approaches to the peak.
- The 5th Platoon, led by Lieutenant Héctor Omar Miño, was positioned behind the 4th Platoon, facing north in support of Lucero's men.
- Browning 12.7mm heavy machine gun teams and German Shepherd Dog squads (from the Puerto Belgrano-based Headquarters Battalion) were also present on Mount Tumbledown and Sapper Hill.
- Marine Tigercat Surface-to-Air Missile (SAM) launchers and Anti-Tank gun and missile teams were also part of the defences, with one anti-tank team located on Mount William in support of Bianchi's men and another anti-tank team supporting Lucero's men. The Marine SAM Platoon equipped with British Blowpipe and Russian SA-7 shoulder-launched missiles were positioned on Sapper Hill.
- The 60mm Mortar Platoon was split in two parts on Tumbledown, with the mortar men positioned near the summit (under Marine Sergeants David Ramos and Lucio Monzón) in support of Vázquez's 4th Platoon.
Early moves[edit]
On the morning of 13 June, the Scots Guards were moved by helicopter from their position at Bluff Cove to an assembly area near Goat Ridge, west of Mount Tumbledown. The British plan called for a diversionary attack south of Mount Tumbledown by a small number of the Scots Guards, assisted by the four light tanks of the Blues and Royals, whilst the main attack came as a three-phase silent advance from the west of Mount Tumbledown.
In the first phase, G company would take the western end of the mountain. In the second phase, Left Flank (company) would pass through the area taken by G company to capture the centre of the summit. In the third phase, Right Flank would pass through Left Flank to secure the eastern end of Tumbledown.
A daytime assault was initially planned, but was postponed at the British battalion commander's request. In a meeting with his company commanders the consensus was that the long uphill assault across the harsh ground of Tumbledown would be suicidal in daylight.
Diversion[edit]
At 8:30 p.m. on 13 June the diversionary attack began. The 2nd Bn Scots Guards' Reconnaissance Platoon, commanded by Major Richard Bethell (a former SAS officer), and supported by four light tanks of the 'Blues & Royals', clashed with the Argentine Marine O Company under Marine Captain Quiroga in a blocking position on the lower slopes of Mount William. On William's southern slopes, one of the tanks was taken out of action by a booby trap.
The initial advance was unopposed, but a heavy firefight broke out when British troops made contact with Argentinian defences. The Argentinians opened fire, killing two British soldiers and wounding four others. After two hours of hard fighting, the Argentinian company withdrew to its main defences on William and the British secured the position. Marine First Class Private José Luis Fazio fought against Bethell's force:
At about 2230 hours our battalion had its first intensive gun battle with British companies which appeared out of nowhere. I heard Private Roberto Barboza yell "The English are here!" ... I remember our Operations Officer requested the artillery to assist at 23.00 with star shells. The close quarter battle was such that the Argentine artillery was unable to drop shells on to the British attackers. I was shooting, doing my work. I don't know if I killed anyone. We just fired our rifles, that's all. Contact was maintained for over an hour before battalion headquarters ordered Obra Company to fall back ... What we did not realise at the time was that at least a wounded Marine made his way to the amphibious engineer platoon position and hurled a grenade wounding a Major. Simultaneously the Major opened fire, killing him.[4]
Fearing a counter-attack, the British platoon withdrew into an undetected minefield, and were forced to abandon their dead.[5] Two men were wounded covering the withdrawal and four more were wounded by mines. The explosions prompted the Argentine Marine Major Antonio Pernías to order the 81 mm mortar platoon on Mount William and the longer-ranged 120 mm mortars attached to 'C' Company, 3rd Infantry Regiment on Sapper Hill to open fire on the minefield and the likely withdrawal route of anyone attacking Mount William.[6] The barrage lasted for about forty minutes and more British casualties would have been inflicted if the mortar bombs had not landed on soft peat, which absorbed most of the power of the explosions.
In 2007, Guardsmen Steven William Duffy and Peter Alexander MacInnes from the Pipes & Drums Platoon recounted their experiences, claiming that some Argentinian Marines were in hot pursuit during the British withdrawal, with Bethell's force suffering a total of 2 killed and 16 wounded.[7]
Night attack[edit]

At 9 p.m., half an hour after the start of the diversionary attack, Major Iain Dalzel-Job's G Company started its advance of nearly two miles. Reaching its objective undetected, the company found the western end of the mountain undefended and occupied it easily, but later came under heavy shellfire that wounded Major Dalzel-Job in the head.[8] Major John Kiszely's Left Flank passed through them and reached the central region of the peak unopposed, but then came under heavy fire.[9]
The Argentinians, later learned to be of company strength, directed mortar, grenade, machine gun and small arms fire from very close range at the British company, killing three British soldiers. Marine Sub-Lieutenant Héctor Mino's 5th Platoon (1st Amphibious Engineer Company), held the rocks behind Sub-Lieutenant Carlos Vázquez's 4th Platoon, N Company. In the centre of the 4th Marine Platoon position were the remnants of Second Lieutenants Óscar Silva's and Marcelo Llambías-Pravaz's RI 4 platoons as well as the remnants of Second Lieutenants Celestino Mosteirín's and Marcelo Dorigón's RI 12 platoons, which had recently fought on Two Sisters, Goat Ridge and Mount Harriet.
For four or five hours, a mixed bag of Marine/Army defenders representing six platoons of Argentinian infantry, engineers and one platoon of mortar men on Tumbledown pinned the British down. To help identify the bunkers, the Guardsmen fired flares at the summit. The Guardsmen traded 66 mm rockets and 84 mm anti-tank rounds with the Argentinians, who were armed with anti-tank rifle grenades and protected in their rock bunkers. The Argentinians refused to budge; the Guardsmen could hear some of them shouting obscene phrases in English and even singing the March of the Malvinas as they fought.[9]
Meanwhile two Royal Navy frigates, HMS Yarmouth and Active, were pounding Tumbledown with their 4.5 inch guns. At one stage Lieutenant Colonel Michael Scott, Commanding Officer of 2 SG, thought the battalion might have to withdraw and attack again the next night, "The old nails were being bitten a bit, if we had been held on Tumbledown it might have encouraged them to keep on fighting".[9]
Left flank[edit]
The fighting was hard going for Left Flank. The Argentinians had well dug-in machine guns and snipers. At 2:30 a.m., however, a second British assault overwhelmed the men of the 4th and 12th Regiments but the survivors of Vazquez's 4th Platoon would continue fighting till about 7:00 am. The British troops swarmed over the mountaintop and killed, wounded or captured several of the RI 4 and RI 12 defenders, at times fighting with fixed bayonets. Marine Private Jorge Sanchez recalled:
The fighting was sporadic, but at times fierce, as we tried to maintain our position. By this time we had ten or twelve dead including one officer [Second Lieutenant Oscar Silva, Argentine Army]. I hadn't fired directly at a British soldier, as they had been too hard to get a clear shot at. I can remember lying there with all this firing going over my head. They were everywhere. The platoon commander [Marine Sub-Lieutenant Carlos Daniel Vazquez] then called Private Ramon Rotela manning the 60 millimetre mortar and Rotela fired it straight up into the air so that the bombs landed on ourselves. At this point I had been up and in actual combat for over six hours. It was snowing and we were tired. Some of the guys had surrendered, but I didn't want to do this. I had only twenty rounds left and I decided to continue the fight from Mount William. I popped up, fired a rifle grenade in the direction of 8 to 10 British soldiers to keep their heads down, and then ran for the 2nd Platoon. I can remember saying some type of prayer hoping the British wouldn't shoot me in the back.[10]
Major Kiszely, who was to become a senior general after the war, was the first man into the 4th Platoon position, personally shooting two Argentinian conscripts and bayoneting a third, his bayonet breaking in two. Seeing their company commander among the Argentinians inspired 14 and 15 Platoons to make the final dash across open ground to get within bayoneting distance of the remaining 4th Platoon Marines. Kiszely and six other Guardsmen suddenly found themselves standing on top of the mountain, looking down on Stanley which was under street lighting and vehicles could be seen moving along the roads. The Argentinians, in the form of Second Lieutenant Augusto La Madrid's platoon from Major Jaimet's B Company and Marine Lieutenant Hector Miño's amphibious engineer platoon (rallied by Marine Lieutenant Waldemar Aquino and Marine Second Lieutenant De Marco), now counter-attacked and a burst of machine gun fire from La Madrid's men wounded three Guardsmen, including Lieutenant Alasdair Mitchell (commander of 15 Platoon). A bullet also passed through the compass secured on the belt of the Left Flank Company commander, injuring Major Kiszely. For his bayonet charge Kiszely was awarded the Military Cross. According to Guardsman Mark Cape,[11] another three Guardsmen defending the summit were also wounded in this action, when Miño, De Marco and Privates Oscar Poltronieri and Carlos Muela attacked their position with hand grenades.[12]
Counterattack[edit]
By 6 a.m., Left Flank's attack had clearly stalled and had cost the British company seven men killed and 18 wounded. On the eastern half of the mountain the platoons of conscripts of La Madrid and Miño platoon, were attempting to renew their advance, having already wounded six Guardsmen, so Colonel Scott ordered Right Flank to push on to clear the final positions. Second Lieutenant La Madrid later described the fighting:
I went forward to make a reconnaissance and could see that the British had two machineguns and a missile launcher in action. I went through another gap in the rocks and was surprised by three men speaking in English behind and above me and firing over the top of me. I could see them with my night binoculars ... I took a rifle grenade and fired at where I had seen the first three men. I heard it explode and some shouts and cries of pain ... I ran back to my position and ordered my men to open fire. We stopped them, but they thinned out and came round our flanks ... They also engaged us with light mortars and missile launchers. This went on for a long time, and we suffered heavy casualties ... We started to run short of ammunition ... Also, I could see that we were outflanked, with the British behind us, so we were cut off from my company ... I reorganized and found that I was down to sixteen men. I started to retire ... I left six men in a line with one machinegun to cover our retreat, but really we were fighting all the time; we could not break contact. They came on us fast, and we fell back ... We eventually got through to Stanley, through what I would like to say was a perfect barrage fired by the Royal Artillery. We had to wait for breaks in the firing, but I still lost a man killed there.[13]
Major Simon Price sent 2 and 3 Platoons forward, preceded by a barrage of 66 mm rockets to clear the Argentine reinforcements. Major Price placed 1 Platoon high up in the rocks to provide fire support for the assault troops.
Lieutenant Robert Lawrence led 3 Platoon around to the right of the Argentinian platoons, hoping to take the Argentinians by surprise. They were detected, however, and the British were briefly pinned down by gunfire before a bayonet charge overwhelmed the Argentinian defenders. Lance-Corporal Graham Rennie of 3 Platoon later described the British attack:
Our assault was initiated by a Guardsman killing a sniper, which was followed by a volley of 66 mm anti-tank rounds. We ran forward in extended line, machine-gunners and riflemen firing from the hip to keep the enemy heads down, enabling us to cover the open ground in the shortest possible time. Halfway across the open ground 2 Platoon went to ground to give covering fire support, enabling us to gain a foothold on the enemy position. From then on we fought from crag to crag, rock to rock, taking out pockets of enemy and lone riflemen, all of whom resisted fiercely.[14]
As La Madrid and Miño withdrew after reportedly suffering five killed in the Argentine counterattack,[15] the platoons under Second Lieutenant Aldo Franco and Guillermo Robredo moved in from the eastern edge of the mountain to try to help La Madrid and Miño. Advancing out of the central region of Tumbledown Mountain, the British again came under heavy fire from the Argentinians, but by advancing in pairs under covering fire, they succeeded in clearing those Bravo Company platoons as well, gaining firm control of the mountain's eastern side.[16]
Right Flank had achieved this at the cost of five wounded, including Lieutenant Lawrence. However, Left Flank had lost two men killed and several wounded during the Argentine counterattack, when mortar fire controllers on Mount William targeted British wounded and stretcher bearers in error.[17] In his moment of victory on the eastern slopes, Lawrence was almost killed when a bullet fired by an Argentine stay-behind sniper tore off the side of his head. He was awarded the Military Cross for bravery, but he spent a year in a wheelchair and was almost totally paralyzed. The Argentinian sniper (in fact Private Luis Jorge Bordón or Walter Ignacio Becerra, according to La Madrid[18]), armed with a FAL rifle, had helped cover the Argentinean retreat, firing shots at a Scout helicopter evacuating wounded off Tumbledown and wounding two men (including Guardsman Kenny Mains). The Scots Guards eventually mortally wounded him in a hail of gunfire,[16] but not before the Argentine soldier generated more confusion, resulting in the wounding of the Forward Observation Officer (FOO, Captain Swinton) attached to the Gurkhas, while clearing the positions of Marine Sergeant Jorge Lucero's 3rd Platoon before advancing on to take Mount William.
Fall of Tumbledown[edit]
By 9:00 a.m., the Scots Guards had gained the high ground east of Tumbledown Mountain and the Gurkhas commenced deploying across the heavily shelled saddle from Tumbledown south to Mount William, which they took with the loss of 8 wounded. The 2nd Battalion Scots Guards had lost eight dead and 43 wounded. The Welsh Guards had lost one dead, the Royal Engineers had also lost one dead, and the Gurkhas had sustained altogether 13 wounded, including the artillery observation officer, Captain Keith Swinton. According to Dhanbahadur Rai, a Gurkha:
The Scots Guards were to attack Tumbledown, with the Gurkhas following behind. We were supposed to finish the attack and they would give us covering fire from Tumbledown ... During the night we followed the Scots Guards and then our CO told us to stop. The ground was like a valley when we stopped and afterwards the shelling started ... The headquarters and A Company had twelve wounded ... The next morning we started to move. The CO sahib and the anti-tank Milan Platoon commander and the FOO were just going up and they got a rifle shot. Our commanding sahib was shouting. He said, "Look, Goli Ayo!" "Get down! Someone fired!" Then the FOO was standing and looking and the second shot hit him in the chest.[19]
The Guards took 30 prisoners, several of them RI 6 soldiers from Bravo Company. The bodies of 30 Argentine Army and Marine soldiers were found in and around the 5th Marine Battalion perimeter. Reaching the rear positions of N Marine Company, Second Lieutenant Franco took the time to set free several German Shepherds left behind in the Argentine retreat from Tumbledown.
During the battle, Guardsman Philip Williams was knocked unconscious by an explosion, and left for dead. When he came to, the rest of the British soldiers had gone. Williams' parents were informed that he had died and a memorial service was held for him. When he returned to civilization after seven weeks, he was accused of desertion by the media and fellow soldiers.[20]
Last stand on Sapper Hill[edit]
Relevant deployments[edit]
While the bulk of the 5th Marine Battalion was deployed on Mounts Tumbledown and William, M Company were stationed along the Sapper Hill slopes, along with supporting Tigercat SAM launchers and Hispano Suiza 30 mm guns from the 1st Marine Anti-Aircraft Battalion, plus extra security in the form of 5 canines (Ñaro, Nego, Vogel, Warner and Xuavia,[21] their handlers, and accompanying riflemen) of the Marine Dog Platoon (Puerto Belgrano-based, under Sub-Lieutenant Miguel Paz). (In all, 18 German Shepherds under Sub-Lieutenant Paz were deployed in and around Stanley.)
Also present on Sapper Hill were 155mm guns from the 101st Artillery Group, the 120mm Heavy Mortar Platoon from Captain Ramón Alberto Varela's C Company, and the Reconnaissance Platoon (under Lieutenant Norman Osvaldo Reynoso) from the 3rd General Manuel Belgrano Mechanized Infantry Regiment. An Air Force mobile Westinghouse AN/TPS-43 long-range radar had been positioned on Sapper Hill in April.
On 1 May, a Royal Navy bombardment of Sapper Hill killed Private Daniel Cabiglioli (from M Company).[22] The Westinghouse radar was also damaged, and would remain out of service for several days.[23] That night, patrolling near Sapper Hill, a five-man squad (under Sergeant Miguel Angel Martinez) from the 3rd Regiment Recce Platoon discovered an abandoned rubber boat. The next day, the 1st Assault Section (under First Lieutenant José Martiniano Duarte) from the 601st Commando Company checked the boat for hidden explosives, then brought it back to Port Stanley for closer examination.[24]
In June, Lieutenant Reynoso's Recce Platoon reportedly exchanged small arms fire with a British patrol (possibly G Squadron from the SAS, who had commandeered a yacht at Bluff Cove Settlement to operate behind Tumbledown[25] and had also sent men forward in a helicopter[26]) infiltrated near Sapper Hill, prior to the final land battles.
On 7 June, the Westinghouse radar reportedly detected the British landings at Fitzroy;[27] the next day, Skyhawk fighter-bombers attacked the British troopships Sir Galahad and Sir Tristram with bombs.
A British Harrier was claimed to be hit by concentrated fire from M Company, on 7 June. According to Private José Luis Fazio:
My companions from M Company opened fire on a Sea Harrier, with rifles. They had been waiting for it, it had passed several times through a sort of air corridor to the airport. They fired all around it so that it would run into the bullets, it tilted, began to smoke and was lost at sea. We felt a big explosion.[28]
No Harriers were shot down on 7 June.[29]
On 12 June, Harrier XW919 was hit by shrapnel, possibly from a Tigercat missile, and seriously damaged while dropping CBUs on an artillery position near Sapper Hill. During the recovery, the aircraft caught fire on Hermes flight deck, owing to a fractured reaction pipe.[30] Argentine sources claim that the aircraft was hit by AAA immediately after the attack. A 155 mm howitzer was lightly damaged and six soldiers injured.[31] (The Harrier had extensive repairs and, though still operational, it was ultimately transferred to the School of Flight Deck Operations at Culdrose,[32] and was eventually donated to the Polish Aviation Museum of Kraków.[33])
On 13 June, a Welsh Guards messenger, bringing forward food supplies to Major Christopher Drewrywe's Number 2 Company (1WG), was killed when his motorbike ran over a mine.[34]
Last Stand[edit]
After first light on 14 June, Major Phillip Neame's D Company of 2 PARA in the final stages of the Battle of Wireless Ridge reported seeing hundreds of Argentinians regrouping on Sapper Hill.[35] Argentine artillery and Second Lieutenant La Madrid 6th Regiment platoon was still in action, firing on Neame's company and losing another two killed (Privates Horacio Echave and Horacio Balvidares[36]) on Sapper Hill. While taking up new positions on Sapper Hill, Sergeant Víctor Hugo Juárez from 5th Marine Battalion HQs, Private Vicente Antonio Díaz from the 1st Amphibious Engineers Company and Private Ricardo Ramírez from the 81mm Mortar Platoon on Mount William are also killed in the fierce British bombardment and long-range retaliatory machinegun and small-arms fire from Neame's company on Wireless Ridge.[citation needed]
On the night of the 13/14 June, the Welsh Guards/Royal Marine Battalion were on standby to help in the British attacks on Mounts Tumbledown and William. Their orders were to move towards Sapper Hill only after these objectives were taken. During the advance, they became bogged down in a minefield, which took them a very long and frustrating time to extract themselves from, after coming under fire from heavy mortars on Sapper Hill. Meanwhile, the men of the 1st Battalion 7th Gurkha Rifles had been spotted and shelled from Argentine mortar fire controllers and artillery officers on Sapper Hill, suffering eight wounded.[37] Earlier on, a Mountain and Arctic Warfare Cadre patrol under Sergeant David Lazenby had penetrated the frozen minefield to secure a landing zone for the British helicopters. Major Drewrywe's Welsh Guards eventually reached the base of Sapper Hill, only to discover that the Argentine M Company was still in position. The Guardsmen were forced to withdraw, protected by the early morning fog, this time avoiding the minefield.[38] Due to this delay, it was decided that 45 Commando should move forward from Two Sisters to occupy Sapper Hill. While 45 Commando were marching towards Sapper Hill, Alpha and Charlie Companies from 40 Commando had escaped from the attention of the Argentine defenders on Sapper Hill and they were picked up by helicopters. They were eventually landed on the slopes of Sapper Hill just as 45 Commando were approaching, so both units attacked and captured the hill.[citation needed]
Argentine Retreat[edit]
Unwilling to abandon Tumbledown, Commander Carlos Robacio on Sapper Hill was planning to counter-attack and drive back the Guardsmen. Only the personal intervention of Colonel Félix Aguiar, the 10th Brigade Chief of Staff, brought the fighting to an end.[39] The 5th Marines worked their way back into Stanley, leaving the 2nd Platoon of Marine Second Lieutenant Marcelo Davis and 3rd Platoon of Marine Second Lieutenant Alejandro Koch of M Company to cover the retreat. The Argentine Marine companies withdrew safely, although pursued by artillery fire and hit by a laser-guided bomb dropped by Flight Lieutenant Mark Hare in XZ133 killing two of the Marine canines, Negro and Ñaro. Argentine Panhard armoured cars were moved forward to the edge of Stanley to cover the retreating troops.[40]
Marine Privates Roberto Leyes, Eleodoro Monzón and Sergio Ariel from M Company were killed protecting the Argentine retreat. Six Royal Marines were wounded by mines and small-arms fire[41][42][43] securing Sapper Hill, including four Marines from 40 Commando, one Sapper from Condor Troop and a forward officer (Major Brian Armitage) from 3 Commando Brigade HQs.[citation needed]
The Royal Marines in Second Lieutenant Carl Bushby's 9 Troop protecting the landing zone successfully defended their position when the Argentine Marines under Davis launched a counter-attack, the last one of the ground campaign.[44][45] Two parked British Sea Kings within range from Koch's Marines sustained minor damage from Sergeant Miguel Angel Vaca's machine-gun and rifle-grenades fired by Corporal Carlos Jorge Sini, but both remained operational.[citation needed]
At the foot of the hill, there was an enormous minefield. Lieutenant Paul Allen and Marine Wayne McGregor of 7 Troop were both wounded activating anti-personnel mines. A group of Sappers from Condor Troop went ahead to clear a path through the mines, losing Sergeant Peter Thorpe badly wounded in the process. Tanks of the Blues & Royals moved forward, to provide covering fire if necessary. During the helicopter evacuations of the wounded, Captain Sam Drennan of No. 656 Squadron would win the Distinguished Flying Cross for rescuing a wounded Gurkha and Guardsman from the middle of a minefield. However, when the Royal Marines and Welsh Guardsmen advanced they found Sapper Hill abandoned. The delay caused by the mines probably saved many lives.[46] The Argentine Marine companies had been deeply entrenched and were well equipped with heavy machine guns. To Guardsman Tracy Evens, the Sapper Hill positions looked impregnable:
We were led to an area that the company would rest at for the night, I still took in the fact the Argies had prepared Sapper Hill well, they had depth positions that would have made the task of taking it very hard.[47]
As the Guardsmen and Royal Marines consolidated their positions, the British lost a Volvo Bv 202 tracked vehicle to an anti-tank mine planted in the Sapper Hill sector.
We ran over a mine. I went up through the roof and the vehicle went up and was turned right round by the explosion, recalled Major Brian Armitage who was shortly evacuated to receive medical treatment.[48]
Military recognition[edit]
For the courage displayed in the attack, men from 2 SG were awarded one Distinguished Service Order, two Military Crosses, two Distinguished Conduct Medals (one posthumously) and two Military Medals. Men from 9 Para Squadron, Royal Engineers, were awarded two Military Medals and Captain Sam Drennan, the Army Air Corps Scout pilot who had picked up the injured soldiers under fire and a former Scots Guards NCO, received the Distinguished Flying Cross.
Carlos Robacio, BIM5 commander, was awarded the Argentine Nation to the Valour in Combat Medal and the battalion itself was decorated by the Argentine Congress in 2002.[49]
Due to his actions on both Two Sisters and Tumbledown, Private Oscar Ismael Poltronieri of La Madrid's platoon was awarded the Argentine Nation to the Heroic Valour in Combat Cross, Argentina's highest military decoration. He is the only conscript soldier in his nation's recent history who has received this honour.[50]
After the battle, Pipe Major James Riddell of 2 SG stood near the top of the mountain and played his bagpipes. He played a quick march he had composed "on the back of a fag packet" [cigarette pack][51] during the battle, following a long tradition in which Pipe Majors were encouraged "to write tunes to commemorate any actions in which their regiments have been engaged".[52][53] He named the tune The Crags of Tumbledown Mountain. It was released as a single by the Pipes and Drums of 2SG a year later.[52][54]
Tumbledown after the war[edit]
The film Tumbledown, directed by Richard Eyre, premiered on 30 May 1988. It is based on the experiences of Lieutenant Robert Lawrence, who was severely wounded during the battle. The film won several awards including the RTS Television Award 1989 for best male actor for Colin Firth's performance in the role of Lieutenant Lawrence.
In 2012, Argentine journalist Nicolás Kasanzew wrote a tango called "Carlos Daniel Vazquez's Thermopylae", which is sung by Carlos Longoni.[55]
A cross has been erected at the summit of the mountain as a memorial to the soldiers who died in the battle.[56]
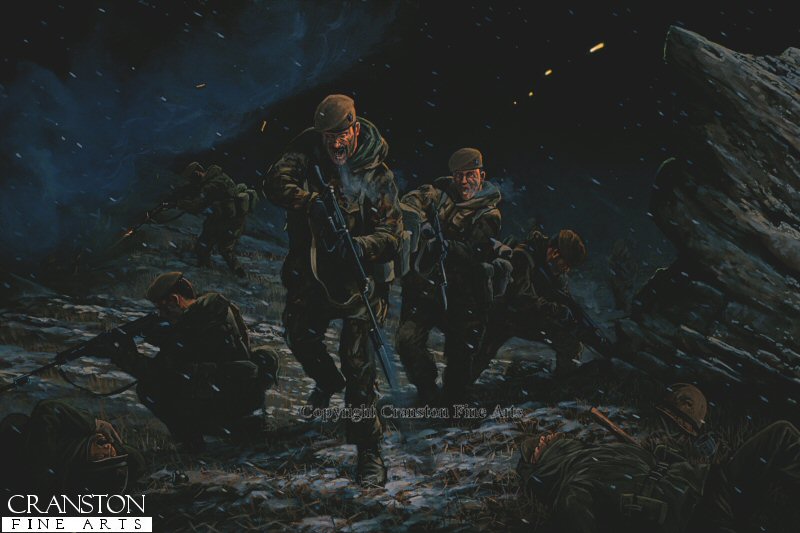
Two British artists have depicted the battle in painting, Mark Churms[57] and Terence Cuneo, the latter commissioned by the Scots Guards.[58][59]
In the UK a Tumbledown Veterans And Families Association was created.[60]
There is a pipe march written by James Riddell of the 2nd Battalion Scots Guards [61] It is called The Crags Of Tumbledown Mountain.[62]
An ode was written in honour of the fallen:[63]
It was the Guardsmen of the Crown
Who scaled the Heights of Tumbledown
And fought that night a bloody fight
To see victory by dawn's first light.
From crag to crag amongst the rock,
They skirmished on, numbed by shock.
Through shell and mortar fire they moved,
Till at last the ground they'd proved
Port Stanley lay there... just ahead,
As they began to count their dead.
But where the glory, where the pride,
Of those eight brave men who died?
They who made that lonely sacrifice
And through each death paid the total price
In their final and heroic act,
Did surely speed the warring parties pact.
Each one who there his life laid down,
Saved countless others from their own unknown.
So those of you who live to talk,
Let your pride hover as does the hawk.
And never let men these acts forget,
Nor the memory of our dead neglect,
But once returned across this vast sea,
Remember then just what it was to be...
A Scots Guardsman.— "Ode to Tumbledown", Lieutenant Mark Mathewson
References[edit]
- ^ a b c d Freedman, Lawrence (2005). The Official History of the Falklands Campaign: War and diplomacy. Psychology Press. ISBN 978-0-7146-5207-8.
- ^ Razor's Edge, Hugh Bicheno, p. 288, Phoenix, 2007
- ^ (The Sinking of the Belgrano, Arthur Gavshon and Desmond Rice pg. 47)
- ^ Nick van der Bijl, "Victory in the Falklands", p. 199, Pen and Sword, 2007
- ^ http://www.britainssmallwars.com/Falklands/Tumbledown.htm [permanent dead link]
- ^ Nine battles to Stanley, Nicholas Van der Bijl, p. 190, Leo Cooper, 1999 [ISBN missing]
- ^ 2SG Tumbledown Falklands
- ^ "Attenshun! Scots Guards hotel is opening (wait for it ..) now". scotsman.com. Retrieved 28 August 2016.
- ^ a b c Patrick Bishop and John Witherow, The Winter War: Falklands Conflict, p. 133
- ^ Nick van der Bijl, Victory in the Falklands, pp. 208–209, Pen and Sword, 2007
- ^ Danziger, Danny (2011). We are soldiers. London: Sphere. ISBN 978-0-7515-4399-5.
Suddenly, I hear something in the rocks and we all go, 'What's that?' Someone asks, 'Who goes there?' The challenge that night was 'Johnny Johnny', and the answer was 'Jimmy Jimmy', which stood for Johnny the Gurkha and Jimmy the Jock. We fired off with 'Johnny Johnny', but received the same answer back, 'Johnny Johnny', instead of 'Jimmy Jimmy'. We got on the radio and asked if Right Flank had come through at this point. Unfortunately, the radio operator was struck at that very moment and we didn't get an answer back. The people were challenging the Argies. The shit hit the fan. We were now being engaged by the enemy. Hand grenades came in. The section commander was hit and the Section 2ic fell to the floor, no movement at all. All that's left now were five Guardsmen and we were screaming lunatics, engaging anything that moved. 360 degrees, until we took control among ourselves.
- ^ Apasionante documental sobre la Guerra de Malvinas
- ^ The Fight for the Malvinas, Martin Middlebrook, pp. 261–262, Viking, 1989
- ^ 5th Infantry Brigade in the Falklands 1982, Nicholas Van der Bijl, David Aldea, page 200, Leo Cooper, 2003
- ^ Oscar Luis Jofre and Félix Roberto Aguiar, Malvinas: La Defensa de Puerto Argentino, page 262, Editorial Sudamericana, 1987
- ^ a b Hugh Bicheno (2007). Razor's Edge. Phoenix. p. 309.
- ^ "A small counter-attack did now take place, but was driven off, but not without further casualties, including a mortar bomb which killed two stretcher-bearers tending to the wounded." For Love of Regiment, Charles Messenger, p. 206, Pen & Sword, 1994
- ^ http://www.lanacion.com.ar/1362425-un-heroe-todos-los-heroes Un héroe, todos los héroes lanacion.com, 03/04/2011
- ^ Chris Bellamy, The Gurkhas: Special Force, p. ?, Hachette, 2011
- ^ Philip Williams and M. S. Power, Summer Soldier, Bloomsbury, 1991. (cover notes) Archived 6 February 2007 at the Wayback Machine
- ^ La historia de los perros de Malvinas Archived 12 September 2017 at the Wayback Machine
- ^ "1º de Mayo Archived 12 September 2017 at the Wayback Machine"
- ^ "En la madrugada del día 31, dos ataques aéreos con aviones Vulcan y Harrier sobre las posiciones del RI 3, del RI 25 y la zona del aeropuerto, pusieron fuera de servicio, transitoriamente, el radar de vigilancia de la Fuerza Aérea." Félix Roberto Aguiar and Francisco Cervo, Operaciones terrestres en las Islas Malvinas, p. 216, Círculo Militar, 1985
- ^ "Fue destacada para su reconocimiento la primera sección del teniente primero José M. Duarte, la cual desde temprano esperó en el antiguo cuartel de los Royal Marines, en Moody Brook, que las condiciones meteorológicas permitieran la salida de los helicópteros asignados a la operación. Llegados al lugar, se pudo comprobar la exactitud del aviso: sobre la playa había un bote neumático en posición invertida." Isidoro Ruiz-Moreno, Comandos en acción: El Ejército en Malvinas, Editorial San Martín, 1987
- ^ "A patrol from G Squadron SAS commandeered a civilian yacht at Bluff Cove, had its engine repaired by army engineers and sailed east along the coast in broad daylight. Finally, they beached their craft within 2 miles of the Argentine positions on Mount Tumbledown. An enemy helicopter flew overhead without opening fire, and the bewildered Argentinians took no offensive action against the SAS party for two days, during which G Squadron called down artillery fire onto the back of Tumbledown." Max Hastings, Simon Jenkins, The Battle for the Falklands, Pan, 1987
- ^ "Then some days later, a helicopter dropped in at battalion HQ containing an SAS patrol commanded by Corporal Nobby Noble of G Squadron, 22 SAS, and formerly of the Grenadier Guards. Nobby knew what we were up to and had dropped in to tell us that he was going to take his patrol forward by helicopter that night and establish an observation post at Port Harriet House." Tim Spicer, An Unorthodox Soldier: Peace and War and the Sandline Affair, p. 88, Mainstream, 1999
- ^ "British Triumph On East Falkland"
- ^ Desde el Frente, Carlos H. Robacio, Jorge Hernandez, p. 180, Centro Naval, Instituto de Publicaciones Navales, 1996
- ^ "During the attack, Macleod's aircraft was hit by shrapnel which penetrated the rear equipment bay area of the aircraft and fractured the aft reaction control air pipe. On decelerating to the hover during the recovery, this caused a fire to start in the rear equipment bay and smoke as seen coming from the aircraft. Fuel indications suggested a considerable fuel leak at the same time. MacLeod executed a very quick and professional landing in worrying circumstances. Having landed-on, the fire was extinguished by the ground crew." RAF diaries, 12 June entry
- ^ En uno de esos ataques −12 de Junio- el enemigo en vuelo rasante (150 mts. del suelo) descargó todos sus cohetes sobre el cañón: resultaron seis heridos leves y fue "tocado" por la propia artillería antiaérea; uno de los sirvientes descargó sobre la máquina enemiga su fusil FAL; el cañón continuó en servicio. Rodríguez Mottino, p. 91
- ^ "Harriers of the Falklands war". Archived from the original on 15 December 2004. Retrieved 13 May 2008.
- ^ www.muzeumlotnictwa.pl
- ^ "A motorcycle messenger in the Welsh Guards was killed when he ran his bike over a mine after bringing rations up to the front line." Patrick Bishop and John Witherow, The Winter War, Quartet, 1982
- ^ "I had been trying to get fire missions down on the retreating closely-packed formation of troops but was told that there was no artillery available. I was going quite spare because I was supposed to have two batteries at my priority call. Here was a golden opportunity being missed. I assumed the enemy was withdrawing to regroup on Sapper Hill and the last thing I wanted was another major battle. Eventually, we got the artillery and started blasting away with everything else we had as well. But as soon as we opened up we got very accurate artillery fire back at our own position. I guessed that they were adjusting onto our muzzle flashes so I told all the company to stop firing with their small arms. I decided that the only thing was to keep fighting this battle with artillery, otherwise, we were just going to have a lot of shit knocked out of ourselves." Max Arthur, Above All, Courage: The Falklands Front Line, page 202, Sidgwick & Jackson, 1985
- ^ "Monte Tumbledown: la batalla final"
- ^ "In the gloomy dawn, Captain Villarraza's Forward Observation Officer on Sapper Hill, Second Lieutenant Marcelo De Marco, radioed 3rd Artillery Group for airburst, which wounded eight Gurkhas." Nick van der Bijl, Victory in the Falklands, p 218, Pen & Sword, 2007
- ^ "After some time an explosion was heard. A Royal Marine had stepped on a mine, followed by another a few minutes later. Our troop then cleared a safe line through the minefield. Once through, we dug in at the base of a hill, only to find that it was still occupied by Argentine troops. So back we went to our original positions, this time around the minefield." J. M. Kneen and D. J. Sutton, Craftsmen of the Army: The Story of the Royal Electrical and Mechanical Engineers (Vol II 1969–1992, Volumes 1969–1992), p. 449, Pen & Sword, 1997
- ^ Oscar Luis Jofre and Félix Roberto Aguiar, Malvinas: La Defensa de Puerto Argentino, page 275, Editorial Sudamericana, 1987
- ^ Un ejemplo de opreración conjunta: Hércules y Panhard
- ^ "Marine Vince Comb, seventeen and a half years old and the youngest man in the troop, was the machine gunner and was hit by bullets in the wrist and arm. He was immediately replaced on the machine gun and two Royal Marines gave him morphine and first aid." Geoffrey Underwood, Our Falklands War: The Men of the Task Force Tell Their Story, p. 42, Maritime Books, 1983
- ^ "9 Troop were inadvertently set down 3 km east of the intended landing zone, and were on Sapper Hill. Two Marines were slightly wounded when the Argentineans fired on them as they withdrew." James D. Ladd, By Sea, by Land: The Royal Marines 1919-1997: An Authorised History, p. 403, HarperCollins, 2000
- ^ "The firefight rolled backwards and forwards. Lieutenant Bushby radioed for help, but he was using a trailing antenna, as opposed to a whip aerial, and was unsuccessful. Marines Coombes was badly wounded in the arm and a second man, who was not wearing a helmet, suffered a head wound." Nick Van Der Bijl, Victory in the Falklands, p. 224, Pen and Sword, 2007
- ^ "An Argentine attack on the Royal Marines right flank was driven back ... The firing gradually slowed down and the Argentines simply evacuated Sapper Hill, as the Royal Marines very slowly got to their feet." Nick van der Bijl, Victory in the Falklands, Pen & Sword, 2007
- ^ "Cuando le ordené al guardiamarina Davis: "¡Listo, nos vamos !", él todavía estaba pensando en el contraataque, y salió disparando hacia el frente, o sea al revés ... Es que Davis y sus hombres estaban listos para largar el contraataque. Fue impresionante su actitud ofensiva." Malvinas: 20 años, 20 héroes, p. 328, Fundación Soldados, 2002
- ^ "Robacio, who came in for criticism from some British officers ... had total command of N Company and the Army platoons involved, and deserves credit for doing all that was possible to limit British gains ... His positioning of heavy weapons on Sapper Hill before the Argentine surrender provided a defensive barrier that would only have been breached at heavy cost in men and equipment." Nick van der Bijl, Victory in the Falklands, p. 211
- ^ "Falklands: Day of Surrender". Britain's Small Wars. Archived from the original on 18 September 2014. Retrieved 28 August 2016.
- ^ Geoffrey Underwood, Our Falklands War: The Men of The Task Force Tell Their Story, p. 70, Maritime Books, 1983
- ^ Honor al valor en combate y Batallón benemérito
- ^ Middlebrook, Martin (1990). The fight for the "Malvinas": the Argentine forces in the Falklands War. Penguin books, p. 239. ISBN 0-14-010767-3
- ^ Sharkey Ward (1992). Sea Harrier over the Falklands: a maverick at war. Leo Cooper. p. 266. ISBN 0-85052-305-2.
- ^ a b The gramophone, Volume 60, Issue 2, page 1089, 1983
- ^ Piping Times, Volume 55 No.1 (October 2002) includes a photo of P/M Riddell playing his bagpipes on top of Mount Tumbledown. Piping Times, Volume 55 No.2 (November 2002) contains a Riddell's handwritten copy of the music.
- ^ householddivision1 (18 June 2014). "The Crags of Mount Tumbledown (Jimmy Riddell)". Retrieved 28 August 2016 – via YouTube.
{{cite web}}: CS1 maint: numeric names: authors list (link) - ^ Nicolas Kasanzew (12 August 2012). "Monte Tumbledown". Retrieved 28 August 2016 – via YouTube.
- ^ "Mount Tumbledown Memorial". Retrieved 6 October 2020.
- ^ "Archived copy". Archived from the original on 3 March 2016. Retrieved 13 September 2014.
{{cite web}}: CS1 maint: archived copy as title (link) - ^ "Archived copy". Archived from the original on 4 March 2016. Retrieved 13 September 2014.
{{cite web}}: CS1 maint: archived copy as title (link) - ^ Naylor, Murray (1995). Among friends: The Scots Guards 1956–1993. London: Pen & Sword. ISBN 978-0-85052-455-0.
- ^ "Tumbledown Veterans And Families Association > Home". Archived from the original on 26 August 2014.
- ^ "Notes - Band of the Scots Guards - the Household Division - Official site".
- ^ "Crags of Tumbledown Mountain, the | Pipetunes".
- ^ Fursdon, Edward (1988). The Falklands aftermath: picking up the pieces. London: Cooper. ISBN 978-0-85052-205-1. pp. 23-24
- General
- Sky News: Return to the Falklands [1][permanent dead link]
- In his first interview in 20 years, Robert Lawrence tells Mark Townsend how the trauma of battle reshaped his life
- [2] As part of his journey of reconciliation Mike Seers travels to Argentina to interview Marine artillery fire controllers and gunners whom he fought against
- Reassessing the Fighting Performance of the Argentine 5th Marines
- Taken from the diary of Guardsman Tracy Evens